Wednesday, December 7, 2022

Amaretti Cookies (naturally gluten and dairy free)

Amaretti Cookies 

     I love a chewy cookie, and I love the flavor of almond extract. These cookies combine the two of those loves! These cookies come together quickly with minimal ingredients, and are naturally gluten and dairy free. They are a great choice if you are taking cookies to someone with those dietary restrictions. I hope you love them as much as I do!


Amaretti Cookies (naturally gluten and dairy free)

Ingredients 

2 1/2 cups very fine almond flour ( Kirklands brand is great)

1 cup granulated sugar

1/2 tsp salt

3 large egg whites

1 tsp almond extract 

1/3 cup of powdered sugar


Directions

1) Pre-heat oven to 325 and line two large baking sheets with parchment paper. These cookies will stick without it as they do not contain oil.

2) In a large bowl whisk the almond flour, sugar and salt and set aside.

3) In the bowl of a stand mixer whisk the 3 egg whites on medium high speed for about 1 minute and 30 seconds until soft peaks form. Add the almond extract and beat for another few seconds to combine.

4) Fold the egg whites into the dry ingredients 1/4 of the egg whites at a time until you have a shaggy dough. It will appear sticky but should not be crumbly if mixed well enough. 

5) Pour the powdered sugar into a small bowl. 

6) Scoop the dough into 1 TBSP size balls and roll each ball in the powdered sugar. Place each cookie about 1 inch apart on the baking sheets. 

7) Bake the cookies for about 22-25 minutes until the bottoms are slightly browned and the tops are cracked. Rotate the trays halfway through. The cookies will stay in a mound shape and not spread out.

10) Let the cookies cool for 5 minutes before removing to a wire rack to cool.

Enjoy!

*Store in an airtight container for 4 days or freeze for up to 3 months!


 Based on the recipe from https://www.foodnetwork.com/recipes/food-network-kitchen/amaretti-cookie-11933611

Tuesday, December 6, 2022

Amaretti Raspberry Thumbprint Cookies ( gluten and dairy free)

Amaretti Raspberry Thumbprint Cookies

     I have always loved the taste of almond extract. I remember my mom adding it to buttercream or cherry desserts growing up and the fragrant smell of the extract always brings me joy! When I saw a local bakery talk about turning their Amaretti (or Italian almond cookies) into thumbprints I knew I had to try it. The best thing about this recipe is that it is naturally gluten and dairy free! I feel like some of the best dessert recipes are, you don't have to sub gluten and dairy free ingredients you can just make it as is!


Amaretti Raspberry Thumbprint Cookies

Ingredients 

2 1/2 cups very fine almond flour ( Kirklands brand is great)

1 cup granulated sugar

1/2 tsp salt

3 large egg whites

1 tsp almond extract 

1/3 cup of powdered sugar

1/2 cup raspberry jam or preserves to fill cookies (Bonne Maman is my favorite)

Directions

1) Pre-heat oven to 325 and line two large baking sheets with parchment paper. These cookies will stick without it as they do not contain oil.

2) In a large bowl whisk the almond flour, sugar and salt and set aside.

3) In the bowl of a stand mixer whisk the 3 egg whites on medium high speed for about 1 minute and 30 seconds until soft peaks form. Add the almond extract and beat for another few seconds to combine.

4) Fold the egg whites into the dry ingredients 1/4 of the egg whites at a time until you have a shaggy dough. It will appear sticky but should not be crumbly if mixed well enough. 

5) Pour the powdered sugar into a small bowl. 

6) Scoop the dough into 1 TBSP size balls and roll each ball in the powdered sugar. Place each cookie about 1 inch apart on the baking sheets. 

7) Using a clean thumb dipped in powdered sugar make a small indention in each cookie. You might need to push the cookie together on the sides a bit after to make the cookie round again. 

8) Fill each cookie with about 1/2 tsp of the raspberry jam.

9) Bake the cookies for about 20-23 minutes until the bottoms are slightly browned and the tops are cracked. Rotate the trays halfway through. 

10) Let the cookies cool for 5 minutes before removing to a wire rack to cool.

Enjoy!

*Store in an airtight container for 4 days or freeze for up to 3 months!


Bacon and Brussels Sprouts Salad

Bacon and Brussels Sprouts Salad

     I LOVE Brussels sprouts. I liked them even before everyone started roasting them with bacon and it was cool to like them. In my early twenties I used to buy individual packages of frozen sprouts and cook them in the microwave. They were always just like tiny cabbages to me, which is also one of my favorite veggies.This recipe is addictive in the best way. I made it for Thanksgiving years ago and it has become a fall tradition in our family. The cold salad goes great with a warm Thanksgiving meal. This salad also holds up so well for days in the fridge so it's great to snack on all week when you are working through your Thanksgiving leftovers. 


Thanksgiving Brussels Sprouts Salad

Ingredients

Juice of one large orange 

1 large shallot minced

1/2 cup olive oil

1 tsp salt

5 cups of shredded Brussels sprouts ( this is two small packages if pre-made)

1/2 cup sliced almonds

1/2 cup parmesan cheese ( optional or use diary free part to make dairy free)

6 slices of cooked bacon crumbled

Directions

1) If your brussels sprouts are not already shredded, trim the ends of the sprouts and use the flat disc on your food processor to shred them, or shred by hand using box grater. 

2) Cook the bacon in the microwave or pan until crispy and remove. 

3) In a small bowl combine the olive oil, juice from the orange, salt, and minced shallot. Whisk to combine.

4) In a large bowl combine the brussels sprouts, almonds, parmesan (if using), and dressing. Toss to combine. Place in refrigerator until ready to serve. 

5) When ready to serve sprinkle the bacon over each serving.

This salad will keep for 4 days covered in the refrigerator. I recommend serving the bacon on the side so that the leftovers will keep better. 


*recipe adapted from Pinch of Yum


Thursday, October 20, 2022

Dairy Free Cinnamon Apple Dip

 Dairy Free Cinnamon Apple Dip

     I think of this recipe every Fall when apple season starts. The first time I made it was when my husband and I were first married. We would have his two younger sisters over once a week for "movie night" which sometimes meant we watched a movie but it was also my opportunity to try out new recipes on them. I remember my sis-in-law Katie loved this dip so much. I kept that in mind, and since feeding people is my love language, I decided to keep making it for her. Her fiancĂ© has a dairy allergy so I wanted to try out the recipe with dairy free cream cheese to see if it would still work. I think it's just as good, if not better! Make sure you use Day brand cream cheese, in my opinion the other dairy free cream cheese brands leave a very strange and salty aftertaste so they don't work well in sweet dishes. One of the things I love about this dip is how you can switch out some ingredients and it will still taste great. If you can have dairy feel free to use cream cheese. If you need it to be lower carb use Swerve brown sugar. You also can use this as a dip for gluten free graham crackers or any other fruit! 


Dairy Free Cinnamon Apple Dip

Ingredients 

1 8 oz package Daiya Dairy Free Cream Cheese ( do not use Kite Hill brand)
1/2 cup coconut or brown sugar
1 tsp vanilla
1 tsp ground cinnamon

Directions

1) In a large bowl combine the cream cheese and brown sugar using an electric mixer until smooth and glossy. This will take about 3-5 minutes. You want the brown sugar to combine very well so the dip is not gritty.

2) Add the vanilla and cinnamon and mix for another 30 seconds. 

3) Serve with sliced apples. 

Store leftovers in the fridge in a sealed container for up to 5 days. 

* You can use regular cream cheese if you can have dairy.
* You can sub 1/2 cup Swerve brown sugar to make this a sugar free dip.


Thursday, September 22, 2022

Applesauce Snack Cake (Gluten Free)

 Johnny Appleseed Applesauce Snack Cake 

     This applesauce snack cake was one of the only cakes I remember my mom making when I was little. She would make us elaborate birthday cakes with homemade buttercream, or this simple but delicious snack cake. I'm sure she made other cakes, but this one stuck out in my memory. I was always excited each fall when she made her first apple cake of the season. As a child I remember sneaking into the kitchen and sneaking little bites. The ingredient list is small and the cake tastes even better the next day. I hadn't had it in years, but recently my sister mentioned it and I knew I had to make a gluten free version. I also made it dairy free so that more friends could enjoy it. I always loved the name too, I have fond memories of reading stories about Johnny Appleseed as a child. 


Applesauce Snack Cake

Ingredients

1/2 cup refined coconut oil ( refined so it doesn't taste like coconut, or butter) melted

1 3/4 cup unsweetened applesauce 

1 cup granulated sugar 

2 tsp cinnamon

1/2 tsp ground cloves

1 tsp baking soda

1/8 tsp salt

2 cups of Bob's Red Mill 1 to 1 Gluten Free Flour

(optional 1 cup of raisins, I leave these out usually)

Directions

1) Pre-heat oven to 350 and grease a 9x13 pan with cooking spray or coconut oil.

2) In a large bowl add the melted coconut oil, applesauce, and sugar and whisk well to combine. You will want to make sure to use refined coconut oil so that it doesn't have a strong coconut taste. Trader Joe's and Simple Truth brand from Kroger carry this.

3) Add the cinnamon, cloves, baking soda, salt, and gluten free flour. Stir well to combine all ingredients. If adding raisins gently stir in at this point. 

4) Pour the mixture into the greased pan and bake for 30-35 minutes until a toothpick comes out clean.

Enjoy!

This will keep at room temperature for 4 days or in the freezer for 3 months so you can grab a piece when you are craving it!

I think the cake tastes even better the second and third day as it becomes more moist as it sits with all the applesauce in it. 


Friday, September 9, 2022

Smoky Paprika Chicken and Veggie Bowls

 Smoky Paprika Chicken and Veggie Bowls

     This is my new favorite meal to make. It has tons of flavor, and is so easy to put together. The warm spices on the chicken make it a perfectly cozy fall meal. You can switch up the roasted veggies based on what you have on hand or your preference. I like the combination of a sweeter veggie like sweet potatoes, carrots, or butternut squash paired with a more savory vegetable with cauliflower. When I'm not in the mood to cook diner I usually put a sheet pan meal in the oven. I love that you can put the ingredients in the oven and come back later and have a delicious hands off meal ready! If you use parchment paper on your sheet pan a bonus is that clean up is easy also! No pans to wash, which is always a bonus. 


Smoky Paprika Chicken and Veggie Bowls

Serves 4-6

Ingredients 

Smoky Paprika Chicken 

2 pounds chicken breast

3 TBSP olive oil 

1 TBSP smoked paprika 

2 tsp cumin 

1/4 tsp crushed red pepper flakes

1/4 tsp cinnamon 

1 garlic clove finely minced

1 TBSP honey

2 TBSP lemon juice

zest of one lemon

1/2 tsp salt

Roasted Veggies

1 head of cauliflower broken into large florets

2 medium sweet potatoes cut into 1/4 inch rounds

2 TBSP olive oil 

1 TBSP sesame seeds

salt to taste 

store bought or homemade hummus to top bowls with 

Directions

1) Pre-heat oven to 400 and line two sheet pans with parchment paper

2) Place the cauliflower florets and sweet potatoes on one of the sheet pans and drizzle with the olive oil. Salt the vegetables generously and use your hands to make sure the veggies are evenly coated. Spread the vegetables out on the pan leaving room in between so they will roast without steaming. 

3) Place the sheet pan with the vegetables in the oven and set a timer for 30 minutes. 

4) Meanwhile, in a small bowl combine the ingredients for the chicken rub and stir to combine. If your chicken breasts are thick place in a ziplock bag and pound to make them even and thinner. I have found this really helps to get juicy and evenly cooked chicken in the oven. 

5) On the second sheet pan place the chicken breast. Using a spoon coat one side of the chicken breasts with the paprika mixture, flip, and then coat the other side. 

6) When the timer for the veggies goes off take the vegetables out of the oven, stir them to make sure they are evenly roasting and sprinkle with the 1 TBSP of sesame seeds. Return the vegetables to the oven and place the sheet pan with the chicken in the oven also. Bake for another 15-20 minutes until the chicken is cooked through and reaches a temperature of 165 and the vegetables are starting to brown. Depending on the size of your vegetables in may take longer or shorter so take them out before the chicken is cooked if they are getting too dark. 

7) Remove the sheet pans from the oven and allow the chicken to rest for 5 minutes before cutting. 

8) In each bowl add sweet potatoes, cauliflower, sliced chicken, and then top with a spoonful of hummus! I think the perfect bite has a little of each of these in it. Adjust salt as needed, I always like to finish my dishes with a little sprinkle of salt.  

Enjoy! 

* You can mix up the veggies in this meal I like the combination of a sweeter veggie like sweet potato, butternut squash, or carrots paired with a more savory vegetable like cauliflower or brussels sprouts. 


Saturday, September 3, 2022

Chocolate Pastry ( Gluten and Dairy Free)

 Gluten and Dairy Free Chocolate Pastry 

     I discovered Schar gluten and dairy free puff pastry last Holiday season and I was so excited to experiment with it. Years ago I would make easy appetizers and desserts for family and friends all the time using regular frozen puff pastry. It always made me feel like a pastry chef. I recently saw a post for an easy dessert using puff pastry and knew it would be the perfect ending to our Lord of The Rings Rings of Power viewing party. I needed it to be gluten free so I could enjoy it and I knew there would be a guest at the party with a dairy allergy. I knew the delicious pastry could easily be adapted to meet both of those dietary requirements. The chocolate pastry was so good there was only one small piece left and even the guests who did not need to eat gluten and dairy free went back for seconds and thirds! If you have been craving chocolate croissant this is the next best thing. 


Gluten and Diary Free Chocolate Pastry 
Recipe for 1 pastry 
(you can double and use both pastries in the box)

Serves 4

Ingredients 

Schar brand gluten and dairy free puff pastry defrosted

Dairy free chocolate bar or Enjoy life chocolate chunks

1 egg for egg wash

1 tbsp almond or coconut milk for egg wash

1 tsp sugar for dusting

extra chocolate for garnish

Directions

1) Pre-heat oven to 400 and place a sheet of parchment paper on a sheet pan.

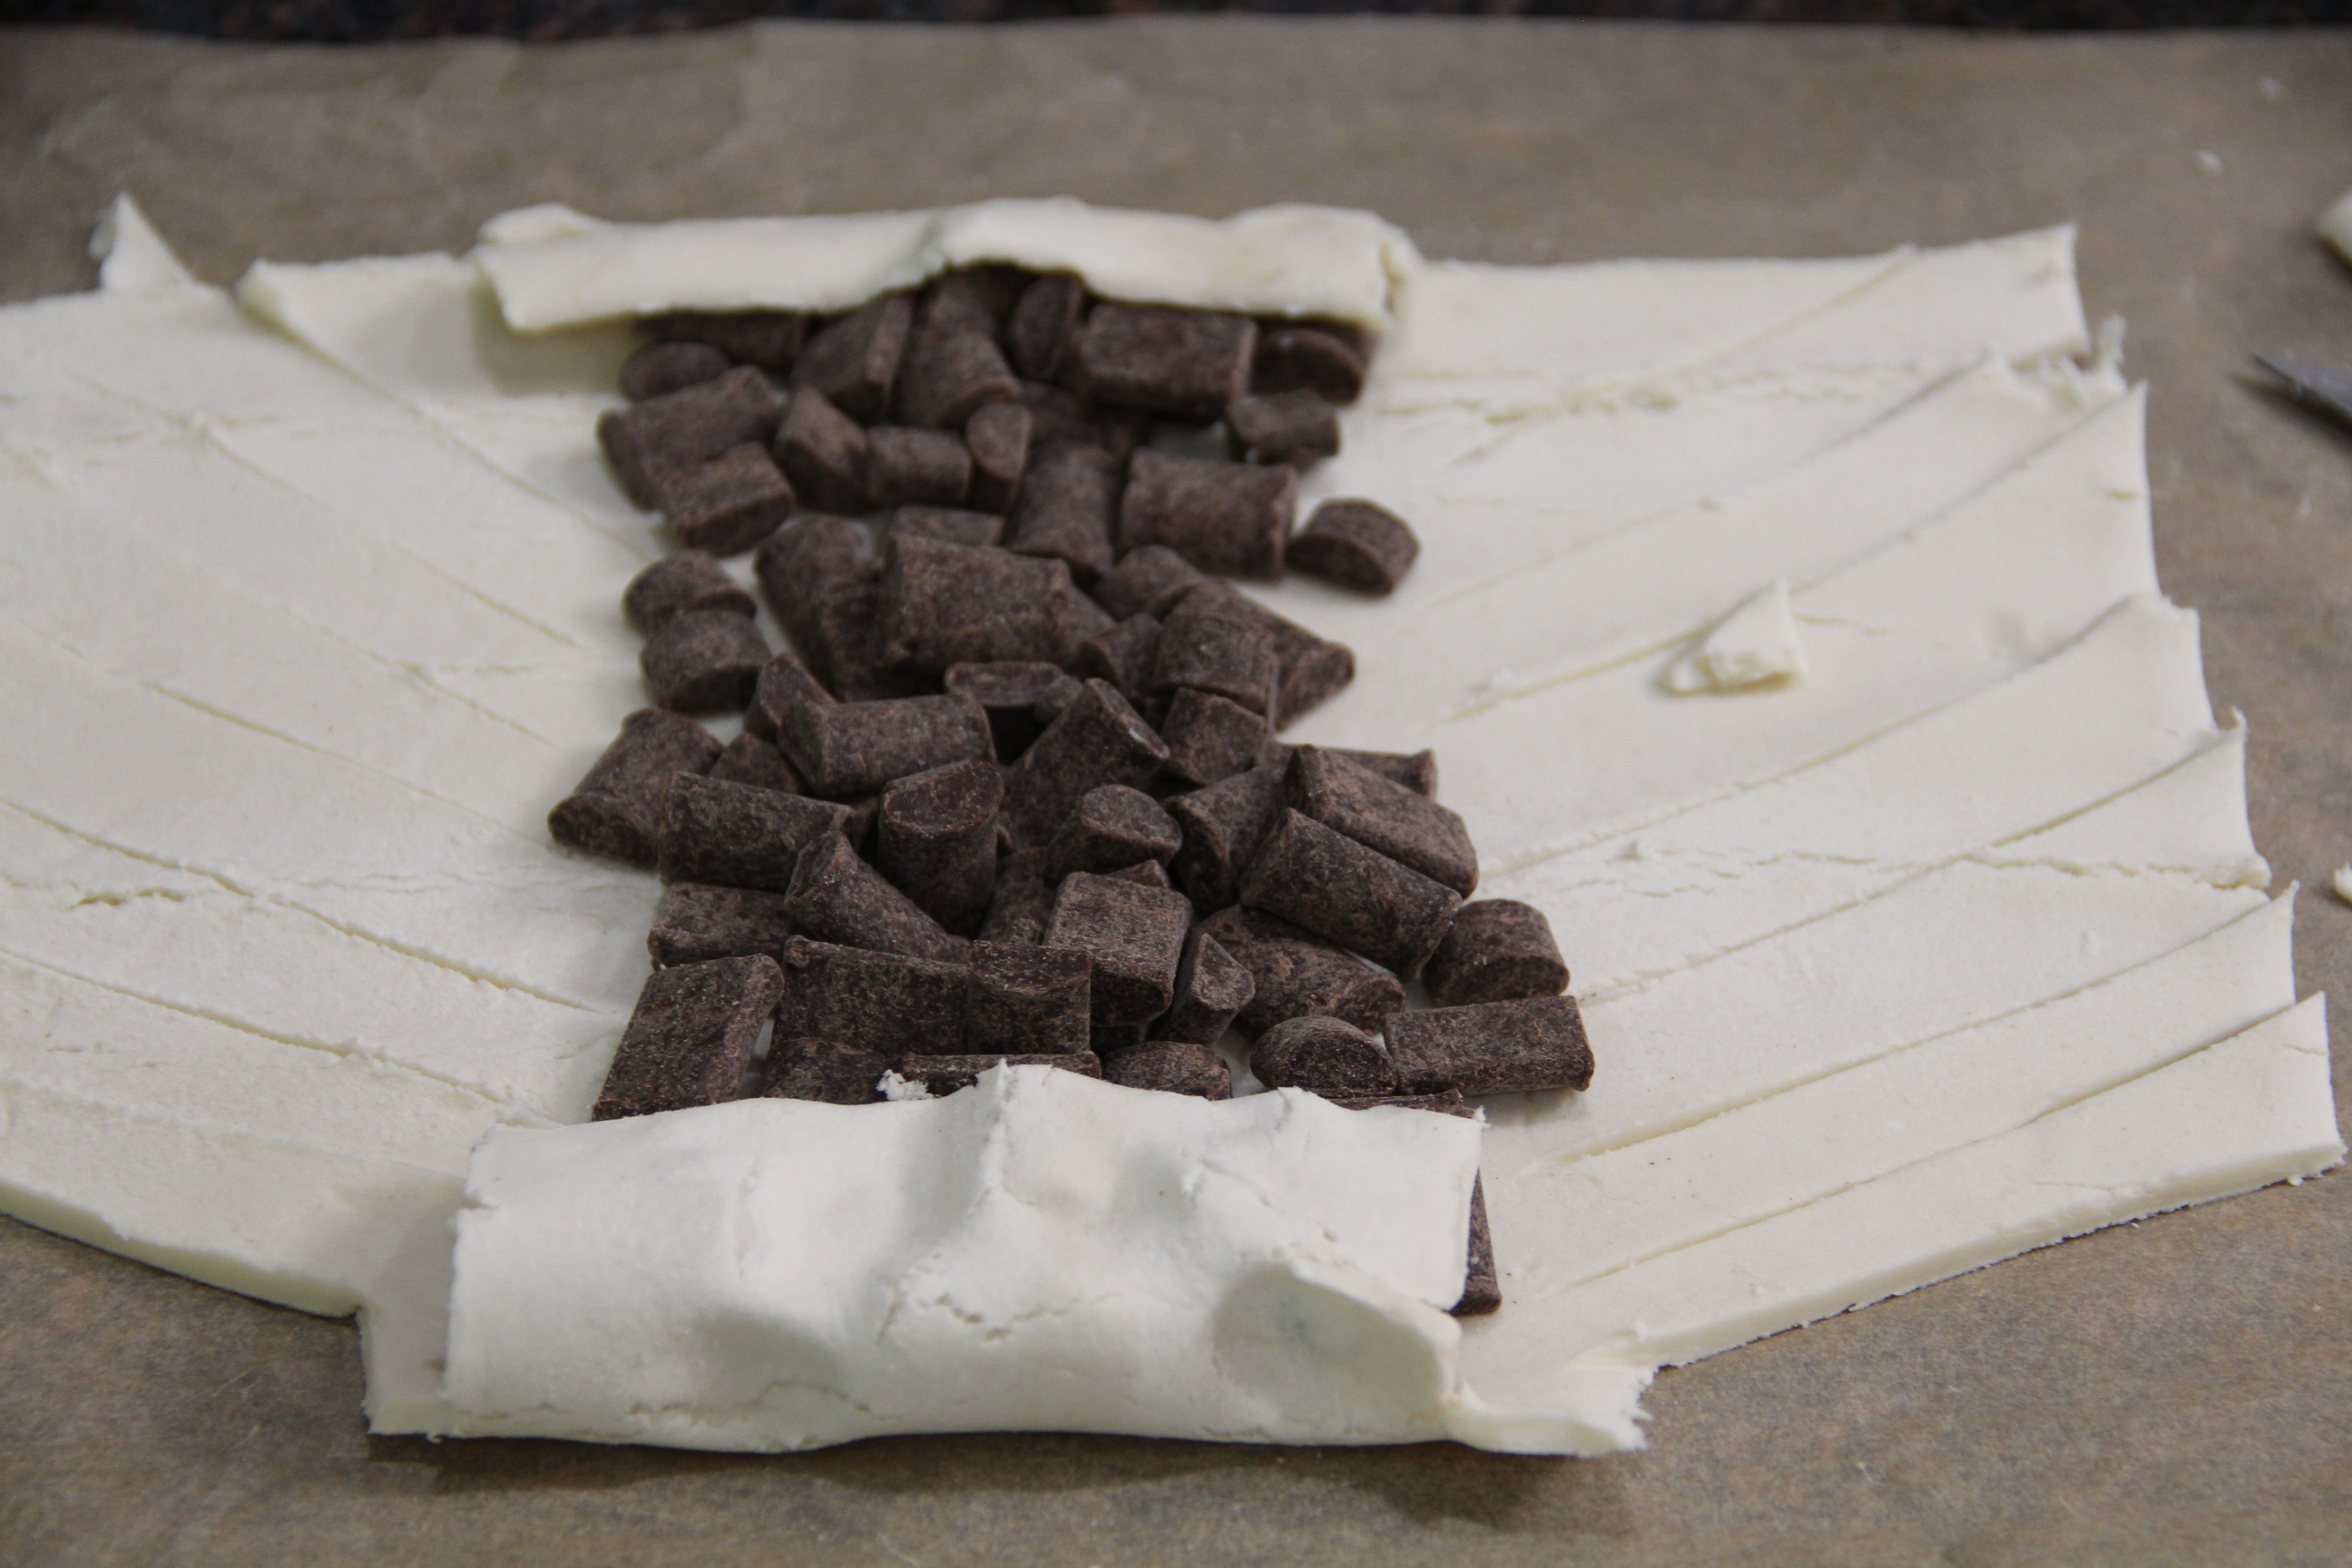
2) Carefully roll out the puff pastry on the parchment paper. Place the chocolate bar or an even layer of  chocolate chunks (about the size and shape of of a chocolate bar) in the middle of the puff pastry. 

3) Cut the corners off the top and bottom of the puff pastry and cut the long sides into strips. See picture below for example.

4) Fold the strips of pastry over each other overlapping over the chocolate. 

5) In a small dish beat the egg and almond milk. Using a pastry brush apply the egg wash over the top of the pastry.

6) Bake for 25 minutes or until pastry is a golden brown color and crispy. 

7) Remove from oven and sprinkle on the tsp of sugar. When the pastry has cooled for at least 10 minutes use a microplane to shave chocolate over the top. 

Serve warm or at room temperature. 

Wrap leftovers in plastic wrap at room temperature. It is best served the day it is made.

Enjoy!

Recipe inspired by 


Thursday, August 25, 2022

Three Ingredient Pumpkin Bars With Cinnamon Cream Cheese Frosting

 Three Ingredient Pumpkin Bars with Cinnamon Cream Cheese Frosting 

(gluten free with dairy free option)

      These pumpkin bars have been a staple in our house since the nineties. I think it was originally a weight watchers recipe that was going around and was topped with cool whip. I made it not weight watchers friendly by adding homemade cinnamon cream cheese frosting which in my opinion makes these bars amazing! The bars are so simple to make. You only need a cake mix (you can use gluten free), a can of pumpkin, and pumpkin pie spice. Most recipes call for a spice cake mix but I have yet to find that in a gluten free version so I use a gluten free yellow or vanilla cake mix and add in lots of pumpkin spice for a warming flavor. I have tried these once with a simple mills cake mix to make them paleo and they will turn out but only make an 8x8 pan and aren't quite as sweet. I have also made the frosting with dairy free "butter" and "cream cheese" and they turn out great but the ingredients are a lot more expensive so I stick to the full dairy frosting unless I'm making them for someone who needs to be dairy free. I have a note at the end of the recipe for brands I suggest if you want to make your frosting dairy free. 


Three Ingredient Pumpkin Bars with Cinnamon Cream Cheese Frosting
(gluten and dairy free options) 

Ingredients 

Pumpkin bars
1 15 oz can pumpkin
1 gluten free yellow or vanilla cake mix ( make sure your cake mix is at least 15 oz.)
1 TBSP pumpkin pie spice

Cinnamon Cream Cheese Frosting

4 oz cream cheese room temp.
4 oz butter room temp.
1 tsp vanilla
1/2 tsp cinnamon 
2 cups powdered sugar

Directions

1) Pre-heat oven to 350 and grease a 9x13 pan with butter or coconut oil.

2) In a large bowl or stand mixer, mix the cake mix, pumpkin, and pumpkin pie spice for 1 minute until fully incorporated. The batter will be very thick.

3) Using an offset spatula spread the batter into the greased 9x13 pan evenly. The batter is thick and will not level out much during baking so make sure you even it out as much as possible when spreading.

4) Bake for 20-25 minutes until a toothpick in the center comes out clean.

5) Make the cream cheese frosting. 
In the bowl of a stand mixer (or you can also use a hand held mixer) combine the cream cheese and butter for 1 minute until smooth. 

6) Add the vanilla, cinnamon, and powdered sugar. Slowly increase the speed to high and mix for 1 minute until the frosting is combined and fluffy. 

7) Allow the cake to cool completely before frosting with an offset spatula. 

Enjoy!

These bars will keep for 5 days covered in the refrigerator. 

Gluten Free Cake Mix Substitutes:
Kroger Brand Simple Truth Organic Gluten Free Yellow Cake Mix is usually what I use for this recipe. It is available at Kroger ( or Baker's or Ralph's ) grocery stores. For an organic cake mix it's a great price under $5 usually. 

Aldi and Natural Grocers also have gluten free vanilla and yellow cake mixes. 

Pillsbury Gluten Free Yellow Cake Mix is the most cost effective. 

Simple Mills makes a great paleo option for a cake mix but it will only make an 8x8 cake so it does not turn out as well. 

Dairy Free Substitutes:

Daiya brand cream cheese is the best tasting brand for "cream cheese" frosting. I've used it a lot to make cream cheese frosting and usually those who aren't dairy free don't even realize it's not real cream cheese in the frosting. It gives you that cream cheese zing but isn't salty. I would not use Miyokos brand as it it too salty. 

Miyokos dairy free butter or Earth Balance taste the best in frosting and have the most buttery taste. 


Sunday, June 19, 2022

Peach Ice Box Cake ( Gluten and Dairy Free)

 Peach Ice Box Cake (Gluten and Dairy Free)


    Have you ever had an icebox cake? They are so easy to make and no bake, which is wonderful this time of year when it's 100 degrees outside! You can make many different variations of Ice Box Cakes, strawberry and chocolate seem to be very popular flavors. Recently I was craving a peach dessert and I decide to experiment with making a peach ice box cake for my weekly summer girls night. I made it gluten and dairy free so everyone could enjoy it and will definitely be making this again! 


Peach Ice Box Cake ( Gluten and Dairy Free)

Serves 9

Ingredients

1 package gluten free vanilla sandwich cookies

1 15 oz. can peaches in juice drained

1 container SoDelicous CoCowhip thawed ( you can use whip cream or cool whip )


Directions

1) Place a single layer of the vanilla sandwich cookies in the bottom of an 8x8 baking dish.

2) Top with 1/2 the can of peaches, make sure you spread the peaches out so each serving will get some!

3) Spread 1/2 of the container of the coco whip evenly over the cookies and peaches.

4) Repeat steps 1-3 saving a few cookies to sprinkle on the top for decoration.

5) Refrigerate for at least 4 hours, or overnight before serving. The longer it sits the softer the cookies will become and the juice from the peaches will incorporate into the cookies. 

Enjoy!

* Note *

 Kinnikinnick,  Kroger Simple Truth brand, and Wal- Mart all have gluten free vanilla sandwich cookies. They all vary in the amount of cookies in the package, If you have a smaller amount of cookies it's okay to leave the crushed cookies off the top or also break the cookies in half so they fit in the pan evenly. It will still taste great once all the ingredients set together! 

Can be kept in the refrigerator for 3 days. 

Sunday, January 30, 2022

Crispy Rice Sun Butter Bars


Crispy Rice Sun Butter Bars

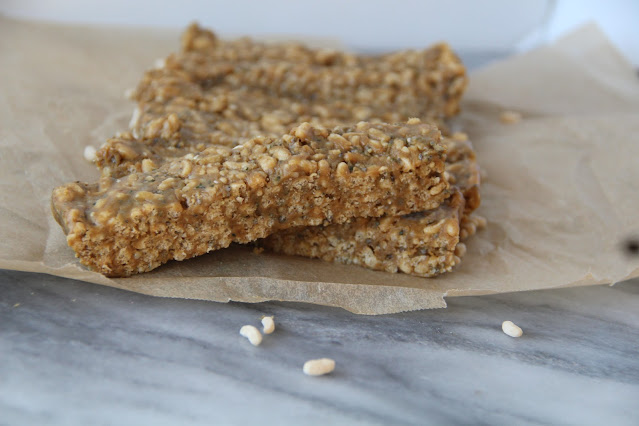
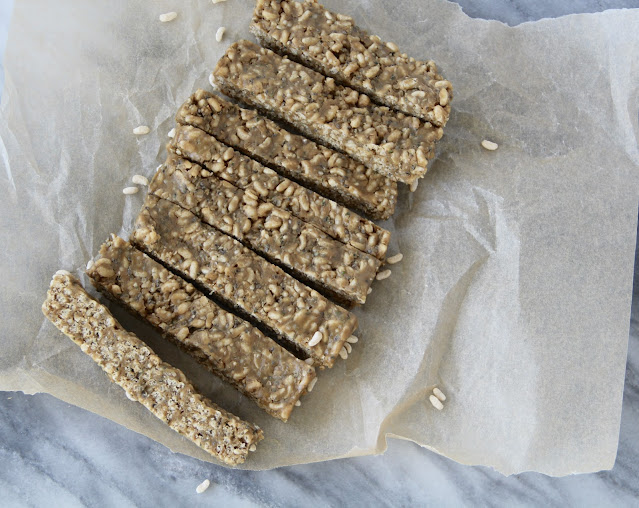
     I have a sweet tooth so I like to have something on hand I can grab when that sweet tooth hits. I came up with these bars after having a hard time finding a bar at the store that met all the criteria I wanted. No peanut butter, made with gf ingredients, and sweet but not too sweet. These bars are sweetened just enough to feel like a treat. They also include a great crunch from the crispy rice and the addition of chia and hemp seeds gives them a nutrient dense boost. They can be kept at room temperature but I prefer the extra crunch you get from keeping them in the refrigerator or even the freezer. I love a recipe that its easy enough to make in just a few minutes and can also be flexible based on what you have on hand.


Crispy Rice Sun Butter Bars

Ingredients 

2 cups gf puffed rice cereal ( Nature's Path and One Degree Organics brands have them) 

2 TBSP hemp seeds

1 TBSP chia seeds

1/2 cup sun butter

1/4 cup maple syrup

1 TBSP coconut oil 

1/4 tsp sea salt 

Directions

1. Line a 9 inch loaf pan with parchment paper and set aside.

2. In a large microwave safe bowl add the sunbutter, maple syrup, and coconut oil. Microwave for 30 seconds, remove and stir, and microwave for 30 more seconds. 

3. Stir the mixture and then add the rice cereal, hemp seeds, chia seeds, and sea salt. 

4. Press the mixture into the parchment lined loaf pan using a spatula to press the mixture firmly down. This will help to shape the bars and allow them to set. 

5. Refrigerate for at least 30 minutes before cutting into bars. 

Enjoy!

* You can just any nut or seed butter in place of the sunbutter. You also may add other nuts or seeds, or even coconut just make sure your total of dry ingredients is very close to two cups or the bars will be dry. The hemp and chia seeds aren't in a large enough amount to need to count towards the two cups.  
 
*These bars keep best in the refrigerator in a sealed container for a week. They can be kept at room temperature in a sealed container but will be softer when you eat them. You may also freeze them for up to three months. I personally like the texture of them frozen! 


Sunday, January 23, 2022

Old Fashioned Key Lime Cookies

 Old Fashioned Key Lime Cookies 

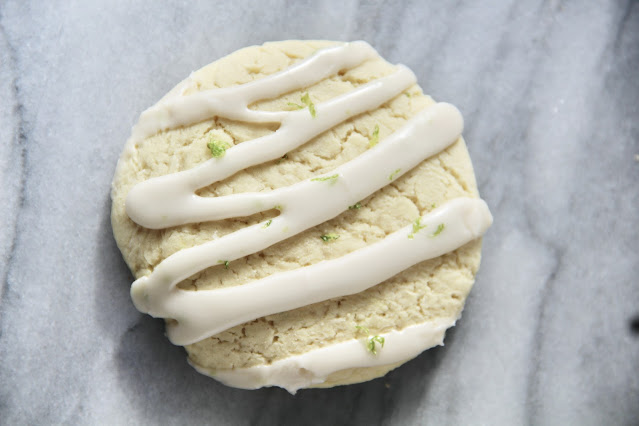
     These cookies are inspired by my Grandma Lucille Elliott. When she moved up to Omaha, Nebraska after living in Miami most of her life she brought an old cool whip container full of frozen key lime juice she had juiced. She knew that key lime pie was my favorite dessert she made and she didn't think you could get key limes in Nebraska. You didn't used to be able to but now during the right season you can find them! I used regular limes in this recipe as I couldn't find key limes but both work well. I love the soft texture of these cookies from the addition of sour cream, baking soda, and baking powder. The recipe is based on my Great Aunt's old fashioned sour cream cookies, or as they were called in her recipe book, boy and girl cookies. I think maybe it's because she used boy and girl cookie cutters? Whatever you call them these cookies are delicious! 


Old Fashioned Key Lime Cookies

1/2 cup unsalted butter room temperature 

1 cup granulated sugar

1/2 TBSP key lime zest

2 eggs

1/2 cup sour cream

2 3/4 cups flour or gluten free flour ( I used Pamela's Gluten Free Blend)

1/4 tsp salt

1tsp baking soda

1 1/2 tsp baking powder 

Key Lime Drizzle

2 1/2 cups powdered sugar

2 TBSP key lime juice

1-2 TBSP milk of choice

1 TBSP key lime zest divided 


Directions

1. Pre-heat oven to 350 and line a sheet pan with parchment paper.

2. In the bowl of a stand mixer cream the sugar, butter, and lime zest for 1-2 minutes until fluffy.

3. In a separate medium sized bowl combine the flour, salt,  baking soda, and baking powder stir to combine. 

4. Turn the mixer to low and incorporate the eggs one at a time, turn the mixer to medium speed and add in the sour cream until incorporated. 

5. With the mixer on low speed slowly add the flour mixture a third at a time, once the flour is all added stop the mixer and use a spatula to stir a few times to make sure all the ingredients are evenly mixed in. The dough will be sticky but should still roll out well. 

6. Transfer the dough to a piece of parchment paper lightly sprinkled with flour. Using a rolling pin roll the dough out to 1/4 of an inch, added more flour as needed so it does not stick. 

7. Using a 3 inch diameter round cookie or biscuit cutter cut the cookies into round discs and place at least 2 inches apart on the parchment lined baking sheet. You will need to bake these cookies in batches or use two cookie sheets for all 18 to fit. Repeat steps 6-7 gathering the dough together, rolling it out, and cutting the cookies out until all of the dough is used. 

8. Bake the cookies for 10-11 minutes until lightly browned on the bottom. The tops will still be light.

9. Let the cookies cool for 30 minutes before frosting. 

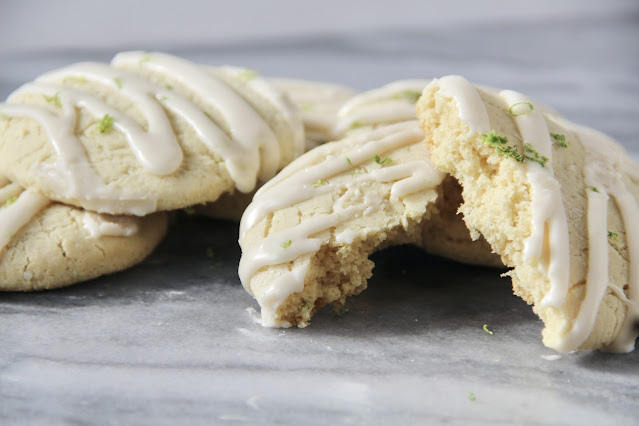
10. Make the key lime glaze, in a medium bowl sift the 2 1/2 cups powdered sugar. Add in 2 TBSP lime juice, 1/2 TBSP lime zest, and 1 TBSP milk of your choice. Using a whisk combine the ingredients until a thick glaze forms. If the glaze is too thick add a tsp of milk at a time until it is the right consistency. 

11. Once the cookies have cooled place the glaze in a piping bag and snip of the end. Drizzle the glaze over the cookies using a back and forth motion. Before the glaze sets use the remaining 1/2 TBSP of lime zest to sprinkle over the cookies.

Enjoy!

These cookies will keep at room temperature for 5 days. 

Saturday, October 2, 2021

Gluten Free Apple Spice Bread

 Gluten Free Apple Spice Bread

    I love making apple desserts! I do enjoy pumpkin spice, but apple has and always will be my go to. This bread is so good with a cup of coffee and even better the second day. The oat flour in the recipe adds a great texture and flavor that you don't get with using just gluten free flour. I like to cut it into individual slices and keep it in the freezer so I have a treat to offer guests (mostly my little sis) when they come over!


Gluten Free Apple Spice Bread

Ingredients

1 Cup Bob's Red Mill Gluten Free Flour

1 1/2 Cups Gluten Free Oat Flour *see note 

1 1/2 Cups coconut sugar

2 tsp baking powder

1 tsp cinnamon

1 1/2 cups apple chopped into small pieces 

1 egg

1 cup almond or coconut milk

1/3 cup coconut oil melted

1 tsp vanilla extract

Topping

2 TBSP coconut sugar

1/4 tsp cinnamon 

Directions

1) Pre-heat oven to 350 and line a bread pan with parchment paper or grease with coconut oil.

2) Using a whisk mix together the egg, coconut sugar, coconut oil, milk, and vanilla in a large bowl until incorporated. 

3) Stir in the gluten free flour, oat flour, baking powder, and cinnamon just until combined. You don't want to overmix gluten free flour or it will become tough.

4) Gently stir in the apples.

5) Pour into the prepared baking dish and sprinkle with the topping.

6) Bake for 40-45 minutes until a toothpick comes out clean. Depending on the depth of your bread pan it may take even longer. Mine took about 45 min.

7) Cool the bread for at least 15 minutes before slicing. 

Enjoy!

This will keep at room temperature for 4 days wrapped tightly but also freezes in slices really well!

*note- to make gluten free oat flour blend oats until a very fine texture, similar to almond flour in a high speed blender. You also can buy oat flour, Bob's Red Mill and Thrive Market have gluten free oat flour. 
You can use all Bob's Red Mill gluten free flour in this recipe and it will still turn out great but I really like the taste and texture better with a mix of the two flours. 

* Subs- you can sub brown sugar for the coconut sugar, and butter for the coconut oil.

* I have also made this bread with cardamom as a 1 to 1 sub for the cinnamon and it tasted great! When I'm in a LPR flare I can't handle cinnamon but do just fine with cardamom so feel free to try it if you love cardamom as much as I do! 


Thursday, September 30, 2021

Dairy Free Cheeseburger Soup

 Dairy Free Cheeseburger Soup

This soup is one of my favorite things to eat on a chilly fall night. The little tang from the mustard in the soup gives it that cheeseburger flavor, and blending the veggies makes have a great texture! You can sprinkle a little dairy free cheese on top, So Delicious Brand is my favorite for their ingredients and taste! I love to freeze this soup in individual servings using my "souper cubes" to heat up for a quick lunch! 


 Dairy Free Cheeseburger Soup

Serves 4 ( you can double the recipe to feed a larger crowd, )

Ingredients 

1 lb ground beef

1 cup peeled and diced carrots

3 cups diced russet potatoes (or use 3 cups Ore Ida Frozen diced hash brown potatoes) 

4 cups chicken broth

2 tsp salt divided 

1/2 tsp onion powder

1 tsp dried parsley 

2 tsp yellow mustard ( mustard from a bottle not mustard powder)

Optional toppings: chopped up pickles, jalapeños, cheese, sour cream, and bacon! 

note: the salt may need to be adjusted based on if you are using low sodium chicken broth, this recipe was made using Pacfic Brand Organic Chicken Broth that has a medium salt level. If you double the recipe double everything but the salt, start with the 2 tsp and add more if needed. 

Directions

1) In a large dutch oven or soup pot over medium high heat add the ground beef and 1 tsp salt. Brown the meat for 5-6 min until cooked through and remove to a dish.

2) In the same pot add the diced carrots, potatoes, chicken broth, onion powder, and 1 tsp of salt. Bring to boil and then reduce to a simmer. Cook for 15-20 minutes or until the potatoes and carrots are cooked until fork tender. 

3) Stir in the yellow mustard and dried parsley. Remove two cups of the soup and puree in a high speed blender for one minute until smooth. 

4) Add the puree and the ground beef back to the soup pot and simmer on low for 5 minutes. 

5) Taste and adjust salt if needed. 

Serve with a sprinkle of dairy free cheese, bacon , and chopped pickles or jalapeños if you want! 

Enjoy!

This will keep for 3 days in the refrigerator and also freezes really well in individual servings. 


Thursday, June 24, 2021

Chimichurri Sauce and Marinade

 Chimichurri Sauce and Marinade 

     The first time I had Chimichurri was in Miami. I grew up going to Miami because that's where my dad was from and where my grandparents lived. It wasn't until I was a teenager that I started to understand the rich food culture Miami had. I would go to the grocery store just so I could explore all the local brands. I loved seeing things like fresh empanadas in the bakery case, and isles full of all sorts of marinades and sauces I had never heard of. Soon I had to make sure I left room when I packed for Miami to bring some of those precious shelf stable sauces home with me. Once I ran out I would start to look up recipes for how to make them on my own. I have always thought Chimichurri was such an easy way to add TONS of flavor to meat and chicken. When I had to stop eating acidic food a few years ago to heal my vocal chords, I forgot all about one of my favorite condiments. I made it recently and was so happy to add it back into my life! Chimichurri is a specialty of Argentina and Uruguay. It's made from lots of fresh parsley, olive oil, and vinegar. I like to use a mix of parsley and cilantro, while not as traditional I have seen many recipes made this way and I like the flavor of the mix of herbs. If you don't like cilantro feel free to use all parsley! 


Chimichurri Sauce and Marinade

(makes about 1/4 cup, enough to marinate 2 lbs of meat or to be used as a dipping sauce, double the recipe if you want to marinate meat and also have some to serve on the side)

Ingredients

1/2 cup fresh parsley leaves

1/2 cup fresh cilantro leaves 

2 tbsp chopped red onion

3 TBSP olive oil

2 TBSP red wine vinegar

1/8 tsp red pepper flakes 

1/2 tsp sea salt 

1/2 tsp fresh black pepper

optional 1 clove of garlic or 1 tsp garlic infused oil

Directions

1) Place all ingredients in a food processor and pulse 10 times or until all ingredients are roughly  chopped.

You also can use an immersion blender for about 10 seconds but the mixture will be a finer texture.

How do you use Chimmichurri?

Serve Chimichurri alongside grilled steak and chicken kebabs as a dipping sauce or drizzle it over the meat for lots of flavor! It's so good you will want to put it on everything! It's also great on eggs and any type of cooked veggie. 

Chimichurri makes a great marinade. Rub the mixture over 2 lbs of chicken or steak cut into 1 inch pieces for kebabs and let marinate for at least 6 hours before grilling. 

Enjoy!

The chimmichurri will keep in a sealed container for 3 days in the fridge. 


Saturday, May 1, 2021

Gluten Free Greek Yogurt Blueberry Muffins

Gluten Free Greek Yogurt Blueberry Muffins

     These are the best gluten free muffins! My husband, son, and dad all love blueberry muffins. I tweaked a recipe I had made before to make these protein filled muffins a little healthier. Brian, my husband will tell me the truth about gluten free baked goods and he LOVES these. The muffins are especially great right out of the oven when the top is crunchy and the center is warm. I love to serve them with a little butter spread on top. The addition of greek yogurt makes for a great texture and added protein, almost 6 grams per muffin!


Gluten Free Greek Yogurt Blueberry Muffins

Ingredients 

3 TBSP melted butter

2/3 cup coconut or maple sugar, plus 2 teaspoons for sprinkling 

2 large eggs

1 tsp vanilla extract

1 1/4 cup greek yogurt 

1 3/4 cup Bob's Redmill Cup for Cup Gluten Free Flour ( the blue bag)

1 cup fresh or frozen blueberries (2 tsp gf flour to coat blueberries) 

1/2 tsp baking soda

1/4 tsp sea salt 

Directions

1) Pre-heat oven to 375 and line a 12 serving muffin tin with liners

2) In a large bowl whisk the melted butter, 2/3 cup sugar, and vanilla for 1 minute until combined.

3) Add the greek yogurt and eggs and whisk until well combined. 

4) Measure the gluten free flour, salt, and baking soda on top of the wet mixture. Stir with a spatula making sure the mixture is well combined. 

5) In a small bowl combine the blueberries and 2 tsp of gf flour. This will help the blueberries to not "bleed" when you mix them in and also help them not sink to the bottom of the muffins when baking.

6) Gently fold the blueberries into the muffin mixture. If you are using frozen blueberries you will want to do this very gently and only a few times so that the blueberries don't start to streak the batter. 

7) Divide the batter evenly between all 12 muffin tins. Sprinkle the 2 tsp of sugar over the tops of the muffins, this makes them have a crispy, sweet top. Bake for 17-20 minutes until a toothpick comes out clean. Some gluten free flours take longer to bake than others so watch them closely, add a minute at a time if they are not cooked through. 

8) Allow to cool for 10 minutes and enjoy!

These will keep for 4 days at room temperature in a sealed container or freeze for 3 months. 

This recipe was adapted from Skinnytaste Yogurt Chocolate Chip Muffins 


    Monday, April 5, 2021

    Peanut Dipping Sauce and Dressing

     Peanut Dipping Sauce and Dressing 


      I love dips and sauces, I always have. I feel like they make a dish. Over the last few years because of health issues most store bought sauces contain ingredients I can't have, and most homemade versions have vinegar, which is also a no-no for me. Vinegar is what makes dressings acidic and makes them so good! I have experimented for awhile with a peanut sauce that tastes just as good as the versions that contain rice vinegar, but is safe for those who can't have vinegar. I LOVE this sauce. I dip spring rolls in it, I drizzle it over chicken, I thin it out a little and use it as a salad dressing. I make a batch of this each week and keep it in the fridge for an easy way to add flavor to a meal. 


    Peanut Dipping Sauce and Dressing 

    Ingredients 

    1/4 cup creamy peanut butter

    1 TBSP maple syrup

    3 TBSP coconut aminos 

    1 TBSP toasted sesame oil

    1-3 TBSP of water depending on use for the sauce 

    ( optional, 1 TBSP of fresh cilantro or green onions, I wanted to make a sauce with ingredients I always have on hand but if I have some fresh herbs to add it makes it even better!)

    Directions

    1) Combine all ingredients except for the water in a small jar and mix with an immersion blender until well incorporated. You can also use a whisk but it will be a lot creamier if you use an immersion blender. 

    2) If you are using it as a dipping sauce serve as is. 

    3) For a salad dressing slowly add one TBSP of water at a time to reach desired consistency. The sauce also will thicken in the refrigerator overnight so you will need to stir it or add a little water or coconut aminos before serving as a dressing. 

    ENJOY! 

    Keeps for 5 days in the refrigerator in a sealed jar. 


    Wednesday, March 10, 2021

    Easy and Tender Corned Beef, Cabbage, and Roasted Potatoes

     Easy and Tender Corned Beef, Cabbage, and Potatoes


      One of my favorite meals of the year is on St. Patrick's Day. We have Irish in our background and my mom always made corned beef and cabbage for dinner on the holiday. I looked forward to this meal and making sandwiches with the leftover meat all year long! The first year I tried to make it on my own I felt like my corned beef wasn't as tender as I remember growing up. I experimented with different ways to cook it and found a method that results in tender beef, with a crispy crust. I slowly cook it all day in the crock pot and then finish it under the broiler for a few minutes before serving. The top of the corned beef with slightly charred mustard seeds was always my favorite part. You don't have to be intimidated this year to make your St. Patrick's Day meal, I wrote out step by step instructions that are easy and pretty hands off most of the day! 


    Easy and Tender Corned Beef, Cabbage, and Potatoes

    Serves 4 with leftover corned beef

    Ingredients

    3-4 LB Uncured Corned Beef Brisket (Trader Joe's or Whole Foods is a good place to look)

    2-3 cups of water

    10 small red potatoes cut into eighths

    1/2 head green cabbage sliced into 1/2 inch slices

    3 TBSP olive oil

    1 tsp salt

    optional- sauerkraut and whole grain mustard on the side

    Directions

    1) Place the corned beef in a large crock pot. If your corned beef comes with a spice packet sprinkle it over the corned beef evenly. If it is a brined corned beef ( Trader Joe's is this year) then pour the liquid in the bag over your corned beef. Use 2-3 cups of water to cover the bottom the crock pot and about 1/2 inch up the side of the corned beef with water. This will help to keep it moist and tender as it cooks. Cook on low for 8-9 hours.

    2) About an hour before you want to serve the corned beef line a sheet pan with parchment paper and pre-heat the oven to 400. Place the red potatoes that are cut into eighths on one side of the pan, and the slices of cabbage on the other side. Drizzle everything with the olive oil and salt. Use your hands or tongs to gently toss to make sure everything is evenly coated. 

    3) Bake the potatoes and cabbage for 45 min until fork tender and slightly browned. 

    4) Remove the cabbage and potatoes from the oven and set to broil.

    5) Using tongs and a spatula move the corned beef brisket from the crock pot and place it on top of the potatoes and cabbage. Be careful to keep the yummy seasoning on top, especially the mustard seeds!

    note- if you don't have high heat parchment you will want to pull the parchment out from under the potatoes and cabbage before you broil or the paper will burn. :)

    6) Place the pan in the oven and broil fro 3-5 minutes watching very closely. I like my corned beef to have a slight crust on top. Broiling it will help to cook the fat on top and also brown the spices a little. Make sure to WATCH CLOSELY so it does not burn!

    7) Serve with grainy mustard or sauerkraut! 

    Enjoy!

    The leftover meat is wonderful on a Reuben or in a hash!  


    Tuesday, February 16, 2021

    Gluten Free Kodiak Cake Funfetti Donuts

     Gluten Free Kodiak Cake Funfetti Donuts 

         My friend Jess introduced me to the gluten free Kodiak Cakes mix this fall. I was hooked. I had been making my pancake mixes from scratch and sometimes it's just nice to have an easier option. I started baking with the mix and discovered all sorts of fun recipes you can make with just a few ingredients. I saw an idea on Hannah Harvesting Health's instagram for making donuts out of the mix, and decided to make them into funfetti donuts. My son absolutely loves these, in his mind they are a donut since they are shaped like one but they only have a few grams of sugar. If your kids are used to a sweeter breakfast I would serve these with maple syrup for dipping, Judah loves them that way! 


    Gluten Free Kodiak Cake Funfetti Donuts 
    Makes 6 

    ( Links to the Gluten Free Kodiak Cakes Mix and Sprinkles are at the bottom of the post)

    Ingredients

    1 cup Kodiak Cakes gluten free pancake and waffle mix

    1/2 cup milk of choice ( we use coconut)

    1 egg

    1 TBSP gluten free rainbow sprinkles 

    Directions

    1) Pre-heat oven to 350 and grease the donut pan with coconut oil liberally. 

    2) In a medium sized bowl crack the egg and use a whisk or fork to beat it until the white and yellow is mixed.

    3) Add the milk, and kodiak cake mix to the bowl and stir until combined, gently stir in the rainbow sprinkles. Do not overmix. 

    4) Evenly divide the batter to make 6 donuts.

    5) Bake for 10 minutes or until a toothpick comes out clean.

    Serve will maple syrup for dipping! 

    Enjoy! 

    recipe based on a recipe by Hannahharvestinghealth on Instagram
    https://www.instagram.com/p/CK1U7yNJx3j/