Saturday, September 3, 2022

Chocolate Pastry ( Gluten and Dairy Free)

 Gluten and Dairy Free Chocolate Pastry 

     I discovered Schar gluten and dairy free puff pastry last Holiday season and I was so excited to experiment with it. Years ago I would make easy appetizers and desserts for family and friends all the time using regular frozen puff pastry. It always made me feel like a pastry chef. I recently saw a post for an easy dessert using puff pastry and knew it would be the perfect ending to our Lord of The Rings Rings of Power viewing party. I needed it to be gluten free so I could enjoy it and I knew there would be a guest at the party with a dairy allergy. I knew the delicious pastry could easily be adapted to meet both of those dietary requirements. The chocolate pastry was so good there was only one small piece left and even the guests who did not need to eat gluten and dairy free went back for seconds and thirds! If you have been craving chocolate croissant this is the next best thing. 


Gluten and Diary Free Chocolate Pastry 
Recipe for 1 pastry 
(you can double and use both pastries in the box)

Serves 4

Ingredients 

Schar brand gluten and dairy free puff pastry defrosted

Dairy free chocolate bar or Enjoy life chocolate chunks

1 egg for egg wash

1 tbsp almond or coconut milk for egg wash

1 tsp sugar for dusting

extra chocolate for garnish

Directions

1) Pre-heat oven to 400 and place a sheet of parchment paper on a sheet pan.

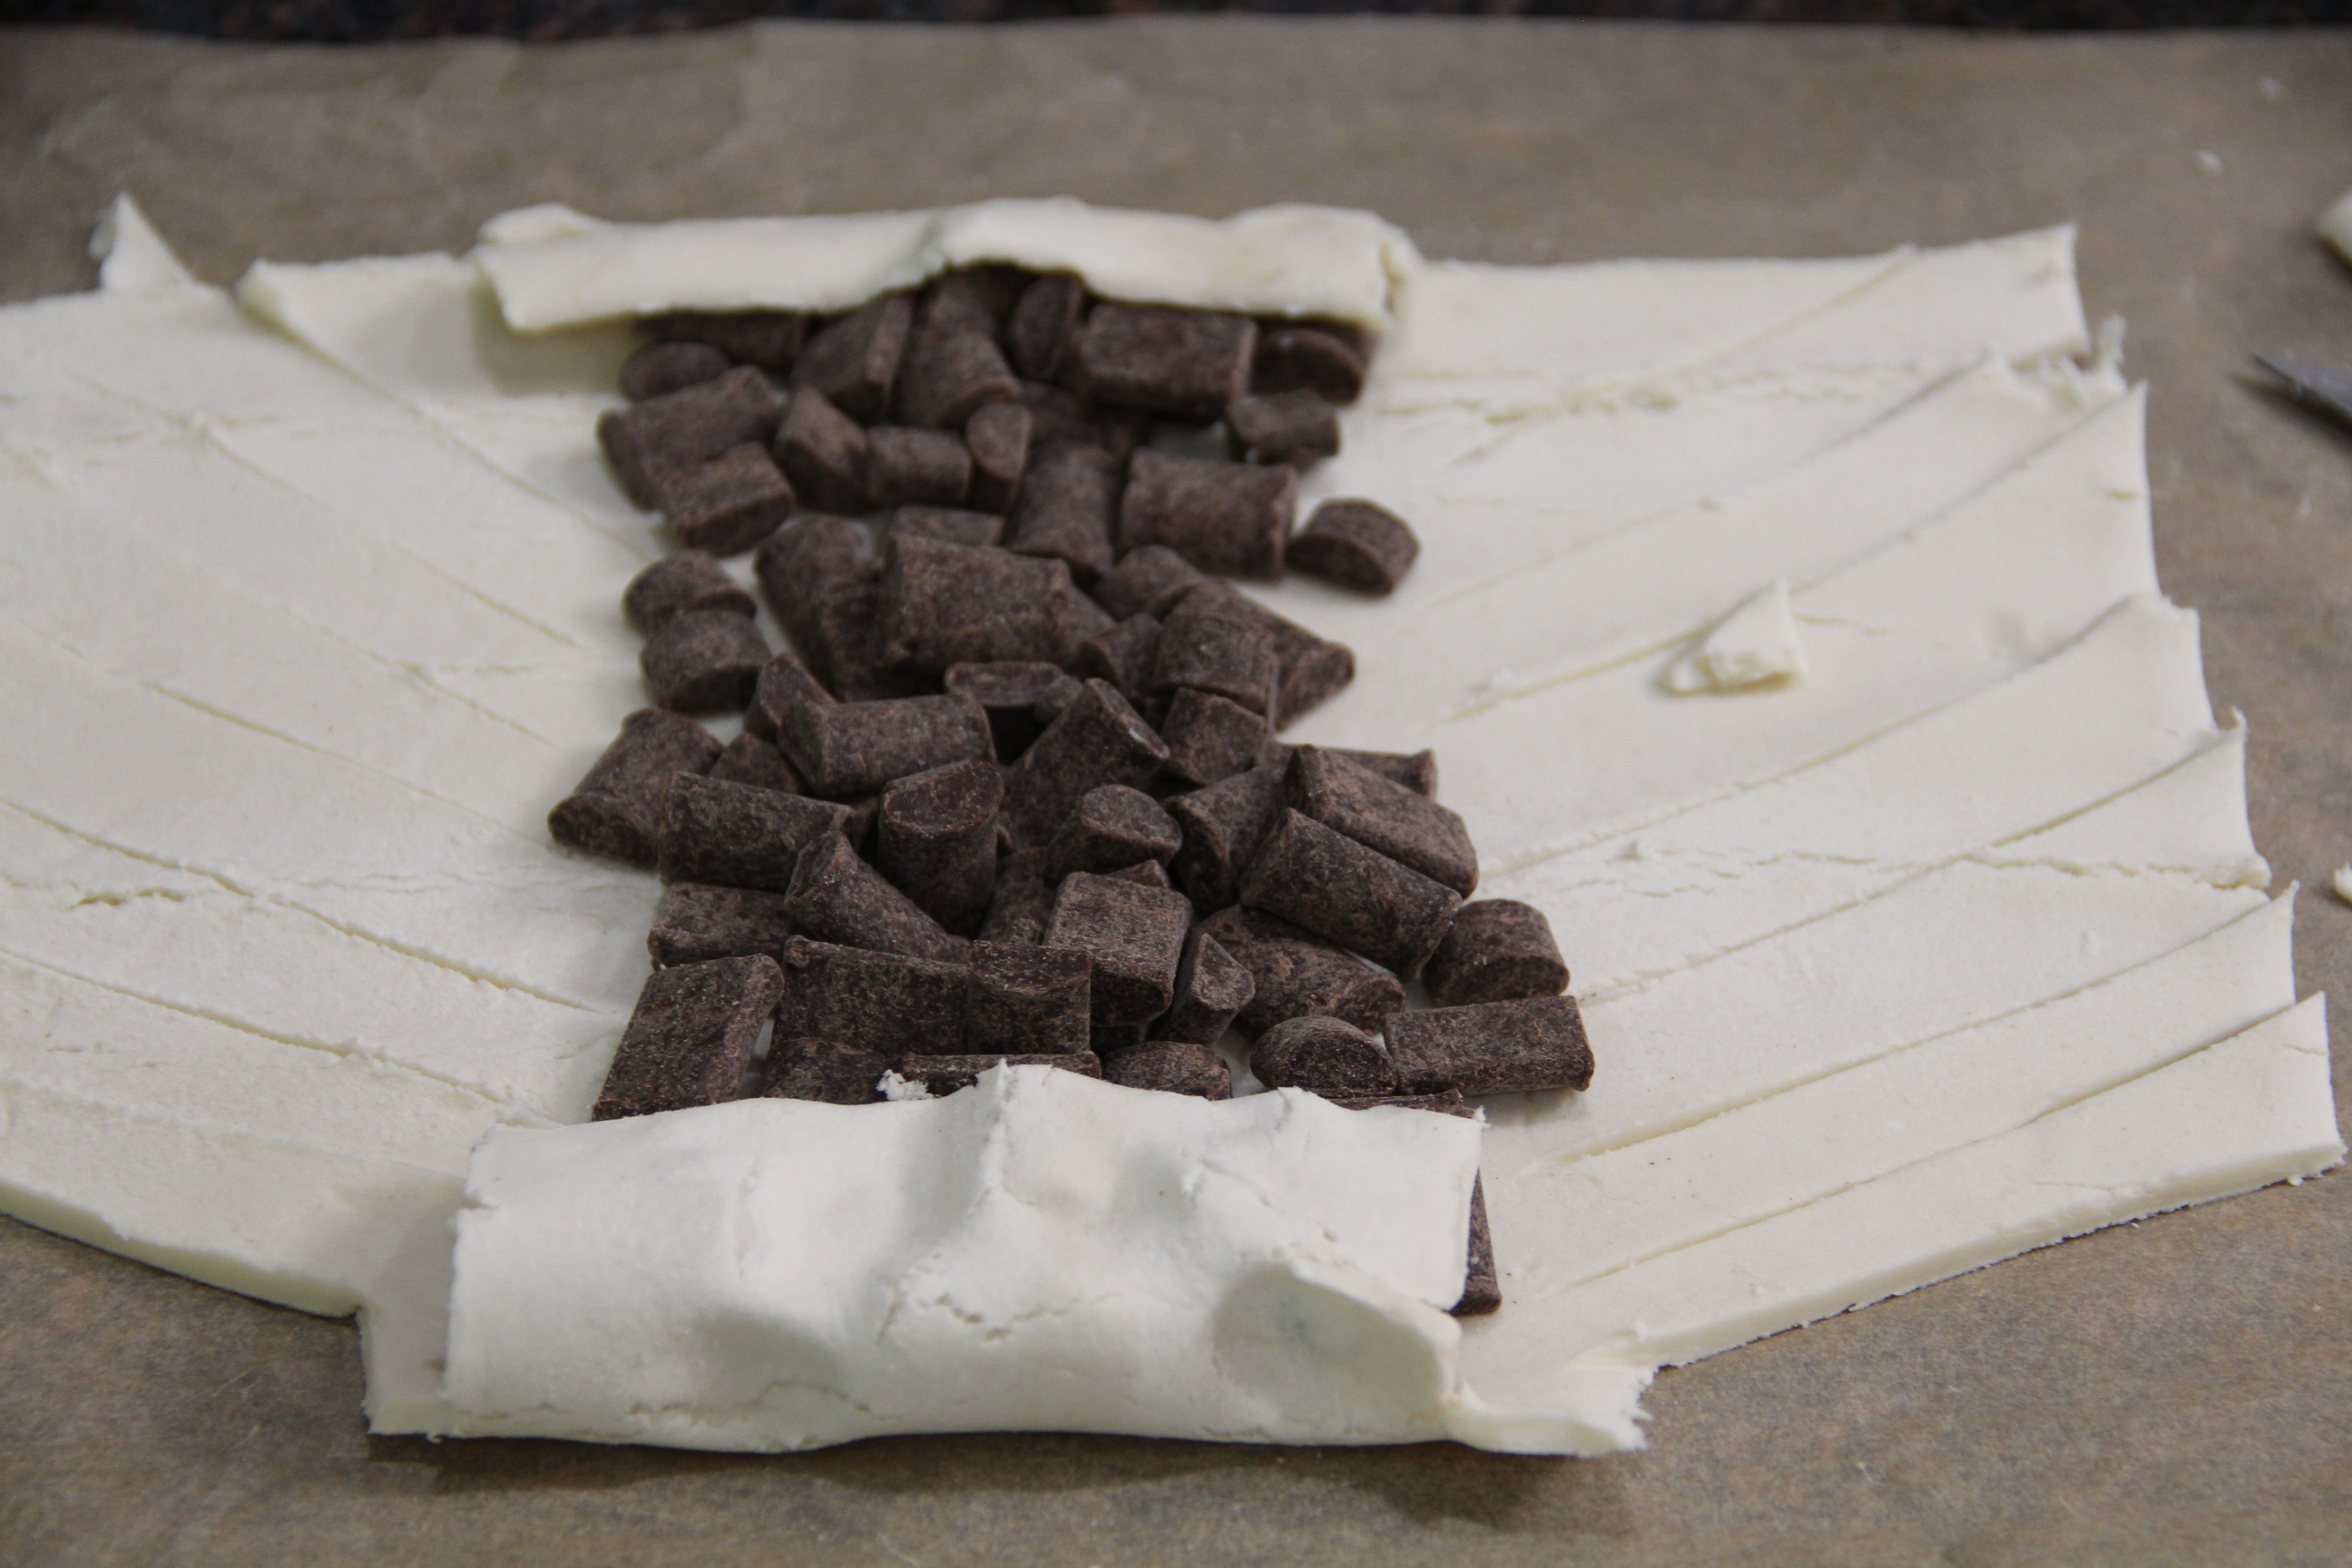
2) Carefully roll out the puff pastry on the parchment paper. Place the chocolate bar or an even layer of  chocolate chunks (about the size and shape of of a chocolate bar) in the middle of the puff pastry. 

3) Cut the corners off the top and bottom of the puff pastry and cut the long sides into strips. See picture below for example.

4) Fold the strips of pastry over each other overlapping over the chocolate. 

5) In a small dish beat the egg and almond milk. Using a pastry brush apply the egg wash over the top of the pastry.

6) Bake for 25 minutes or until pastry is a golden brown color and crispy. 

7) Remove from oven and sprinkle on the tsp of sugar. When the pastry has cooled for at least 10 minutes use a microplane to shave chocolate over the top. 

Serve warm or at room temperature. 

Wrap leftovers in plastic wrap at room temperature. It is best served the day it is made.

Enjoy!

Recipe inspired by 


Thursday, August 25, 2022

Three Ingredient Pumpkin Bars With Cinnamon Cream Cheese Frosting

 Three Ingredient Pumpkin Bars with Cinnamon Cream Cheese Frosting 

(gluten free with dairy free option)

      These pumpkin bars have been a staple in our house since the nineties. I think it was originally a weight watchers recipe that was going around and was topped with cool whip. I made it not weight watchers friendly by adding homemade cinnamon cream cheese frosting which in my opinion makes these bars amazing! The bars are so simple to make. You only need a cake mix (you can use gluten free), a can of pumpkin, and pumpkin pie spice. Most recipes call for a spice cake mix but I have yet to find that in a gluten free version so I use a gluten free yellow or vanilla cake mix and add in lots of pumpkin spice for a warming flavor. I have tried these once with a simple mills cake mix to make them paleo and they will turn out but only make an 8x8 pan and aren't quite as sweet. I have also made the frosting with dairy free "butter" and "cream cheese" and they turn out great but the ingredients are a lot more expensive so I stick to the full dairy frosting unless I'm making them for someone who needs to be dairy free. I have a note at the end of the recipe for brands I suggest if you want to make your frosting dairy free. 


Three Ingredient Pumpkin Bars with Cinnamon Cream Cheese Frosting
(gluten and dairy free options) 

Ingredients 

Pumpkin bars
1 15 oz can pumpkin
1 gluten free yellow or vanilla cake mix ( make sure your cake mix is at least 15 oz.)
1 TBSP pumpkin pie spice

Cinnamon Cream Cheese Frosting

4 oz cream cheese room temp.
4 oz butter room temp.
1 tsp vanilla
1/2 tsp cinnamon 
2 cups powdered sugar

Directions

1) Pre-heat oven to 350 and grease a 9x13 pan with butter or coconut oil.

2) In a large bowl or stand mixer, mix the cake mix, pumpkin, and pumpkin pie spice for 1 minute until fully incorporated. The batter will be very thick.

3) Using an offset spatula spread the batter into the greased 9x13 pan evenly. The batter is thick and will not level out much during baking so make sure you even it out as much as possible when spreading.

4) Bake for 20-25 minutes until a toothpick in the center comes out clean.

5) Make the cream cheese frosting. 
In the bowl of a stand mixer (or you can also use a hand held mixer) combine the cream cheese and butter for 1 minute until smooth. 

6) Add the vanilla, cinnamon, and powdered sugar. Slowly increase the speed to high and mix for 1 minute until the frosting is combined and fluffy. 

7) Allow the cake to cool completely before frosting with an offset spatula. 

Enjoy!

These bars will keep for 5 days covered in the refrigerator. 

Gluten Free Cake Mix Substitutes:
Kroger Brand Simple Truth Organic Gluten Free Yellow Cake Mix is usually what I use for this recipe. It is available at Kroger ( or Baker's or Ralph's ) grocery stores. For an organic cake mix it's a great price under $5 usually. 

Aldi and Natural Grocers also have gluten free vanilla and yellow cake mixes. 

Pillsbury Gluten Free Yellow Cake Mix is the most cost effective. 

Simple Mills makes a great paleo option for a cake mix but it will only make an 8x8 cake so it does not turn out as well. 

Dairy Free Substitutes:

Daiya brand cream cheese is the best tasting brand for "cream cheese" frosting. I've used it a lot to make cream cheese frosting and usually those who aren't dairy free don't even realize it's not real cream cheese in the frosting. It gives you that cream cheese zing but isn't salty. I would not use Miyokos brand as it it too salty. 

Miyokos dairy free butter or Earth Balance taste the best in frosting and have the most buttery taste. 


Sunday, June 19, 2022

Peach Ice Box Cake ( Gluten and Dairy Free)

 Peach Ice Box Cake (Gluten and Dairy Free)


    Have you ever had an icebox cake? They are so easy to make and no bake, which is wonderful this time of year when it's 100 degrees outside! You can make many different variations of Ice Box Cakes, strawberry and chocolate seem to be very popular flavors. Recently I was craving a peach dessert and I decide to experiment with making a peach ice box cake for my weekly summer girls night. I made it gluten and dairy free so everyone could enjoy it and will definitely be making this again! 


Peach Ice Box Cake ( Gluten and Dairy Free)

Serves 9

Ingredients

1 package gluten free vanilla sandwich cookies

1 15 oz. can peaches in juice drained

1 container SoDelicous CoCowhip thawed ( you can use whip cream or cool whip )


Directions

1) Place a single layer of the vanilla sandwich cookies in the bottom of an 8x8 baking dish.

2) Top with 1/2 the can of peaches, make sure you spread the peaches out so each serving will get some!

3) Spread 1/2 of the container of the coco whip evenly over the cookies and peaches.

4) Repeat steps 1-3 saving a few cookies to sprinkle on the top for decoration.

5) Refrigerate for at least 4 hours, or overnight before serving. The longer it sits the softer the cookies will become and the juice from the peaches will incorporate into the cookies. 

Enjoy!

* Note *

 Kinnikinnick,  Kroger Simple Truth brand, and Wal- Mart all have gluten free vanilla sandwich cookies. They all vary in the amount of cookies in the package, If you have a smaller amount of cookies it's okay to leave the crushed cookies off the top or also break the cookies in half so they fit in the pan evenly. It will still taste great once all the ingredients set together! 

Can be kept in the refrigerator for 3 days. 

Sunday, January 30, 2022

Crispy Rice Sun Butter Bars


Crispy Rice Sun Butter Bars

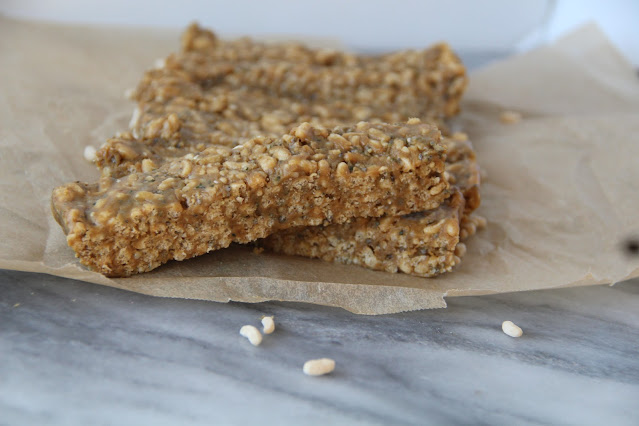
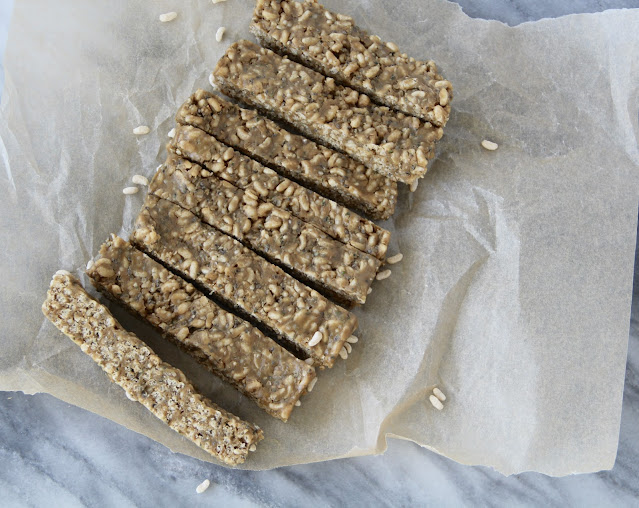
     I have a sweet tooth so I like to have something on hand I can grab when that sweet tooth hits. I came up with these bars after having a hard time finding a bar at the store that met all the criteria I wanted. No peanut butter, made with gf ingredients, and sweet but not too sweet. These bars are sweetened just enough to feel like a treat. They also include a great crunch from the crispy rice and the addition of chia and hemp seeds gives them a nutrient dense boost. They can be kept at room temperature but I prefer the extra crunch you get from keeping them in the refrigerator or even the freezer. I love a recipe that its easy enough to make in just a few minutes and can also be flexible based on what you have on hand.


Crispy Rice Sun Butter Bars

Ingredients 

2 cups gf puffed rice cereal ( Nature's Path and One Degree Organics brands have them) 

2 TBSP hemp seeds

1 TBSP chia seeds

1/2 cup sun butter

1/4 cup maple syrup

1 TBSP coconut oil 

1/4 tsp sea salt 

Directions

1. Line a 9 inch loaf pan with parchment paper and set aside.

2. In a large microwave safe bowl add the sunbutter, maple syrup, and coconut oil. Microwave for 30 seconds, remove and stir, and microwave for 30 more seconds. 

3. Stir the mixture and then add the rice cereal, hemp seeds, chia seeds, and sea salt. 

4. Press the mixture into the parchment lined loaf pan using a spatula to press the mixture firmly down. This will help to shape the bars and allow them to set. 

5. Refrigerate for at least 30 minutes before cutting into bars. 

Enjoy!

* You can just any nut or seed butter in place of the sunbutter. You also may add other nuts or seeds, or even coconut just make sure your total of dry ingredients is very close to two cups or the bars will be dry. The hemp and chia seeds aren't in a large enough amount to need to count towards the two cups.  
 
*These bars keep best in the refrigerator in a sealed container for a week. They can be kept at room temperature in a sealed container but will be softer when you eat them. You may also freeze them for up to three months. I personally like the texture of them frozen! 


Sunday, January 23, 2022

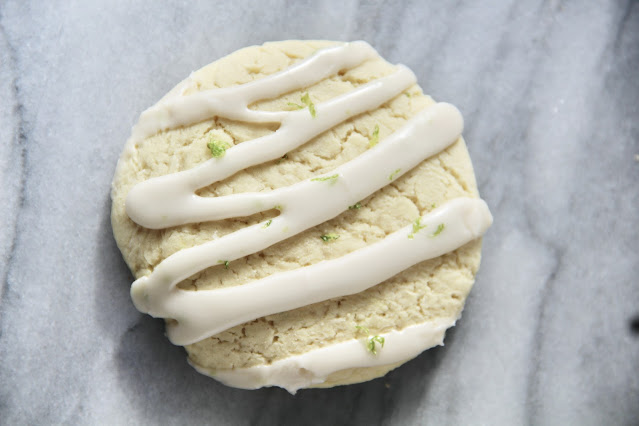
Old Fashioned Key Lime Cookies

 Old Fashioned Key Lime Cookies 

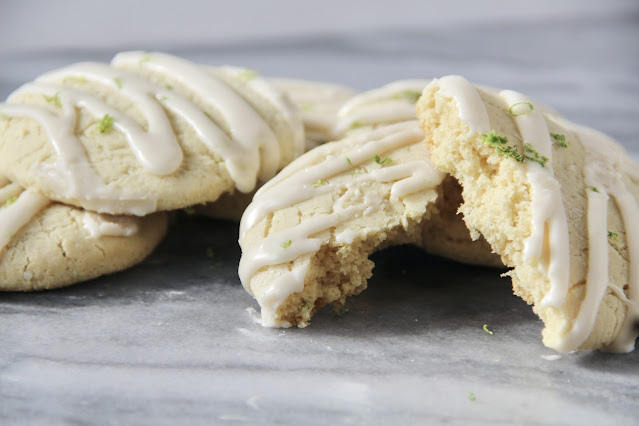
     These cookies are inspired by my Grandma Lucille Elliott. When she moved up to Omaha, Nebraska after living in Miami most of her life she brought an old cool whip container full of frozen key lime juice she had juiced. She knew that key lime pie was my favorite dessert she made and she didn't think you could get key limes in Nebraska. You didn't used to be able to but now during the right season you can find them! I used regular limes in this recipe as I couldn't find key limes but both work well. I love the soft texture of these cookies from the addition of sour cream, baking soda, and baking powder. The recipe is based on my Great Aunt's old fashioned sour cream cookies, or as they were called in her recipe book, boy and girl cookies. I think maybe it's because she used boy and girl cookie cutters? Whatever you call them these cookies are delicious! 


Old Fashioned Key Lime Cookies

1/2 cup unsalted butter room temperature 

1 cup granulated sugar

1/2 TBSP key lime zest

2 eggs

1/2 cup sour cream

2 3/4 cups flour or gluten free flour ( I used Pamela's Gluten Free Blend)

1/4 tsp salt

1tsp baking soda

1 1/2 tsp baking powder 

Key Lime Drizzle

2 1/2 cups powdered sugar

2 TBSP key lime juice

1-2 TBSP milk of choice

1 TBSP key lime zest divided 


Directions

1. Pre-heat oven to 350 and line a sheet pan with parchment paper.

2. In the bowl of a stand mixer cream the sugar, butter, and lime zest for 1-2 minutes until fluffy.

3. In a separate medium sized bowl combine the flour, salt,  baking soda, and baking powder stir to combine. 

4. Turn the mixer to low and incorporate the eggs one at a time, turn the mixer to medium speed and add in the sour cream until incorporated. 

5. With the mixer on low speed slowly add the flour mixture a third at a time, once the flour is all added stop the mixer and use a spatula to stir a few times to make sure all the ingredients are evenly mixed in. The dough will be sticky but should still roll out well. 

6. Transfer the dough to a piece of parchment paper lightly sprinkled with flour. Using a rolling pin roll the dough out to 1/4 of an inch, added more flour as needed so it does not stick. 

7. Using a 3 inch diameter round cookie or biscuit cutter cut the cookies into round discs and place at least 2 inches apart on the parchment lined baking sheet. You will need to bake these cookies in batches or use two cookie sheets for all 18 to fit. Repeat steps 6-7 gathering the dough together, rolling it out, and cutting the cookies out until all of the dough is used. 

8. Bake the cookies for 10-11 minutes until lightly browned on the bottom. The tops will still be light.

9. Let the cookies cool for 30 minutes before frosting. 

10. Make the key lime glaze, in a medium bowl sift the 2 1/2 cups powdered sugar. Add in 2 TBSP lime juice, 1/2 TBSP lime zest, and 1 TBSP milk of your choice. Using a whisk combine the ingredients until a thick glaze forms. If the glaze is too thick add a tsp of milk at a time until it is the right consistency. 

11. Once the cookies have cooled place the glaze in a piping bag and snip of the end. Drizzle the glaze over the cookies using a back and forth motion. Before the glaze sets use the remaining 1/2 TBSP of lime zest to sprinkle over the cookies.

Enjoy!

These cookies will keep at room temperature for 5 days. 

Saturday, October 2, 2021

Gluten Free Apple Spice Bread

 Gluten Free Apple Spice Bread

    I love making apple desserts! I do enjoy pumpkin spice, but apple has and always will be my go to. This bread is so good with a cup of coffee and even better the second day. The oat flour in the recipe adds a great texture and flavor that you don't get with using just gluten free flour. I like to cut it into individual slices and keep it in the freezer so I have a treat to offer guests (mostly my little sis) when they come over!


Gluten Free Apple Spice Bread

Ingredients

1 Cup Bob's Red Mill Gluten Free Flour

1 1/2 Cups Gluten Free Oat Flour *see note 

1 1/2 Cups coconut sugar

2 tsp baking powder

1 tsp cinnamon

1 1/2 cups apple chopped into small pieces 

1 egg

1 cup almond or coconut milk

1/3 cup coconut oil melted

1 tsp vanilla extract

Topping

2 TBSP coconut sugar

1/4 tsp cinnamon 

Directions

1) Pre-heat oven to 350 and line a bread pan with parchment paper or grease with coconut oil.

2) Using a whisk mix together the egg, coconut sugar, coconut oil, milk, and vanilla in a large bowl until incorporated. 

3) Stir in the gluten free flour, oat flour, baking powder, and cinnamon just until combined. You don't want to overmix gluten free flour or it will become tough.

4) Gently stir in the apples.

5) Pour into the prepared baking dish and sprinkle with the topping.

6) Bake for 40-45 minutes until a toothpick comes out clean. Depending on the depth of your bread pan it may take even longer. Mine took about 45 min.

7) Cool the bread for at least 15 minutes before slicing. 

Enjoy!

This will keep at room temperature for 4 days wrapped tightly but also freezes in slices really well!

*note- to make gluten free oat flour blend oats until a very fine texture, similar to almond flour in a high speed blender. You also can buy oat flour, Bob's Red Mill and Thrive Market have gluten free oat flour. 
You can use all Bob's Red Mill gluten free flour in this recipe and it will still turn out great but I really like the taste and texture better with a mix of the two flours. 

* Subs- you can sub brown sugar for the coconut sugar, and butter for the coconut oil.

* I have also made this bread with cardamom as a 1 to 1 sub for the cinnamon and it tasted great! When I'm in a LPR flare I can't handle cinnamon but do just fine with cardamom so feel free to try it if you love cardamom as much as I do! 


Thursday, September 30, 2021

Dairy Free Cheeseburger Soup

 Dairy Free Cheeseburger Soup

This soup is one of my favorite things to eat on a chilly fall night. The little tang from the mustard in the soup gives it that cheeseburger flavor, and blending the veggies makes have a great texture! You can sprinkle a little dairy free cheese on top, So Delicious Brand is my favorite for their ingredients and taste! I love to freeze this soup in individual servings using my "souper cubes" to heat up for a quick lunch! 


 Dairy Free Cheeseburger Soup

Serves 4 ( you can double the recipe to feed a larger crowd, )

Ingredients 

1 lb ground beef

1 cup peeled and diced carrots

3 cups diced russet potatoes (or use 3 cups Ore Ida Frozen diced hash brown potatoes) 

4 cups chicken broth

2 tsp salt divided 

1/2 tsp onion powder

1 tsp dried parsley 

2 tsp yellow mustard ( mustard from a bottle not mustard powder)

Optional toppings: chopped up pickles, jalapeƱos, cheese, sour cream, and bacon! 

note: the salt may need to be adjusted based on if you are using low sodium chicken broth, this recipe was made using Pacfic Brand Organic Chicken Broth that has a medium salt level. If you double the recipe double everything but the salt, start with the 2 tsp and add more if needed. 

Directions

1) In a large dutch oven or soup pot over medium high heat add the ground beef and 1 tsp salt. Brown the meat for 5-6 min until cooked through and remove to a dish.

2) In the same pot add the diced carrots, potatoes, chicken broth, onion powder, and 1 tsp of salt. Bring to boil and then reduce to a simmer. Cook for 15-20 minutes or until the potatoes and carrots are cooked until fork tender. 

3) Stir in the yellow mustard and dried parsley. Remove two cups of the soup and puree in a high speed blender for one minute until smooth. 

4) Add the puree and the ground beef back to the soup pot and simmer on low for 5 minutes. 

5) Taste and adjust salt if needed. 

Serve with a sprinkle of dairy free cheese, bacon , and chopped pickles or jalapeƱos if you want! 

Enjoy!

This will keep for 3 days in the refrigerator and also freezes really well in individual servings.